SSO with Okta
Learn how to establish a Single Sign On (SSO) with Okta.
Overview
Okta is an identity and access management platform that provides SSO solutions for organizations. It allows users to access multiple applications and services using a single set of credentials, aiming to simplify the user authentication experience. Okta operates on a cloud platform and supports SAML 2.0.
This guide outlines the steps to configure SSO using Okta.
You must be an Account Owner or Administrator on ComplyCube and have administrative permission on Okta to set up SSO.
ComplyCube does not send an email confirmation when the SSO setup is complete.
Setup steps
Create an Okta account
The first step is to create an account with Okta. When this guide was written, Okta offered a free trial account to assist with the initial setup.
You can follow their instructions to register an account and download their app on your phone to complete the setup.
Add integration to Okta and configure SAML-based SSO
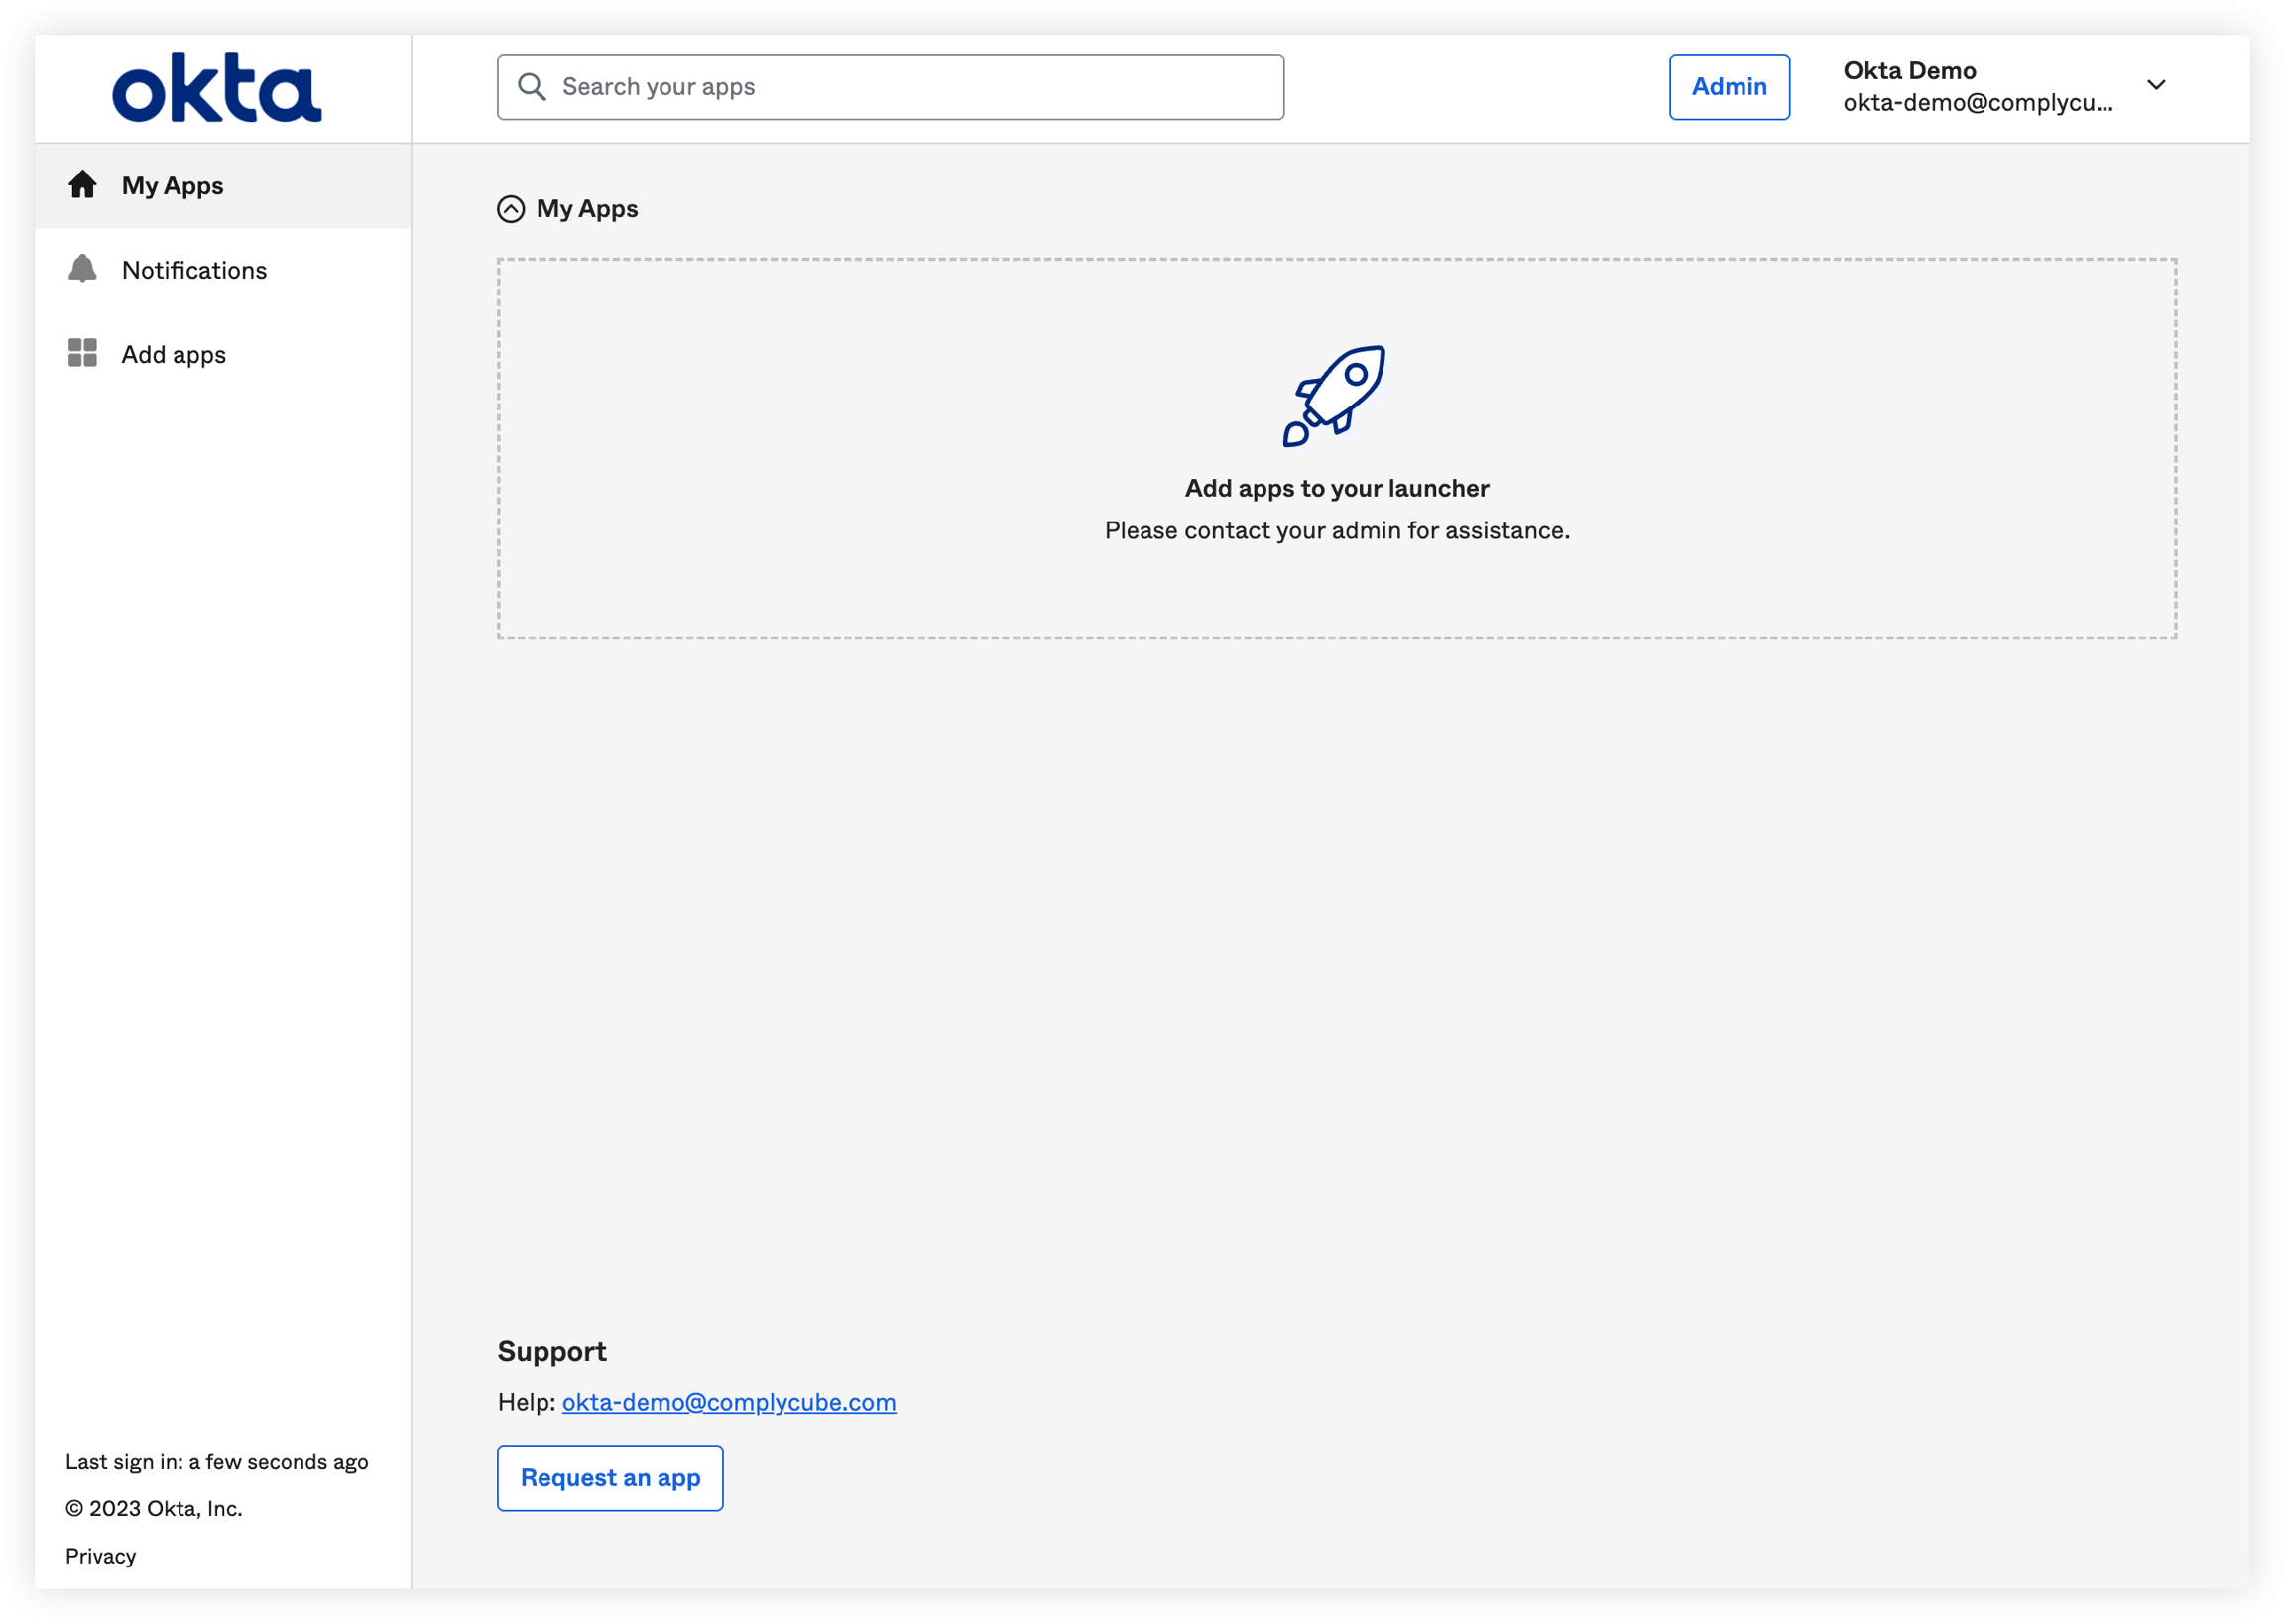
Once your account is set up, log in and click on Admin to switch to Admin mode.
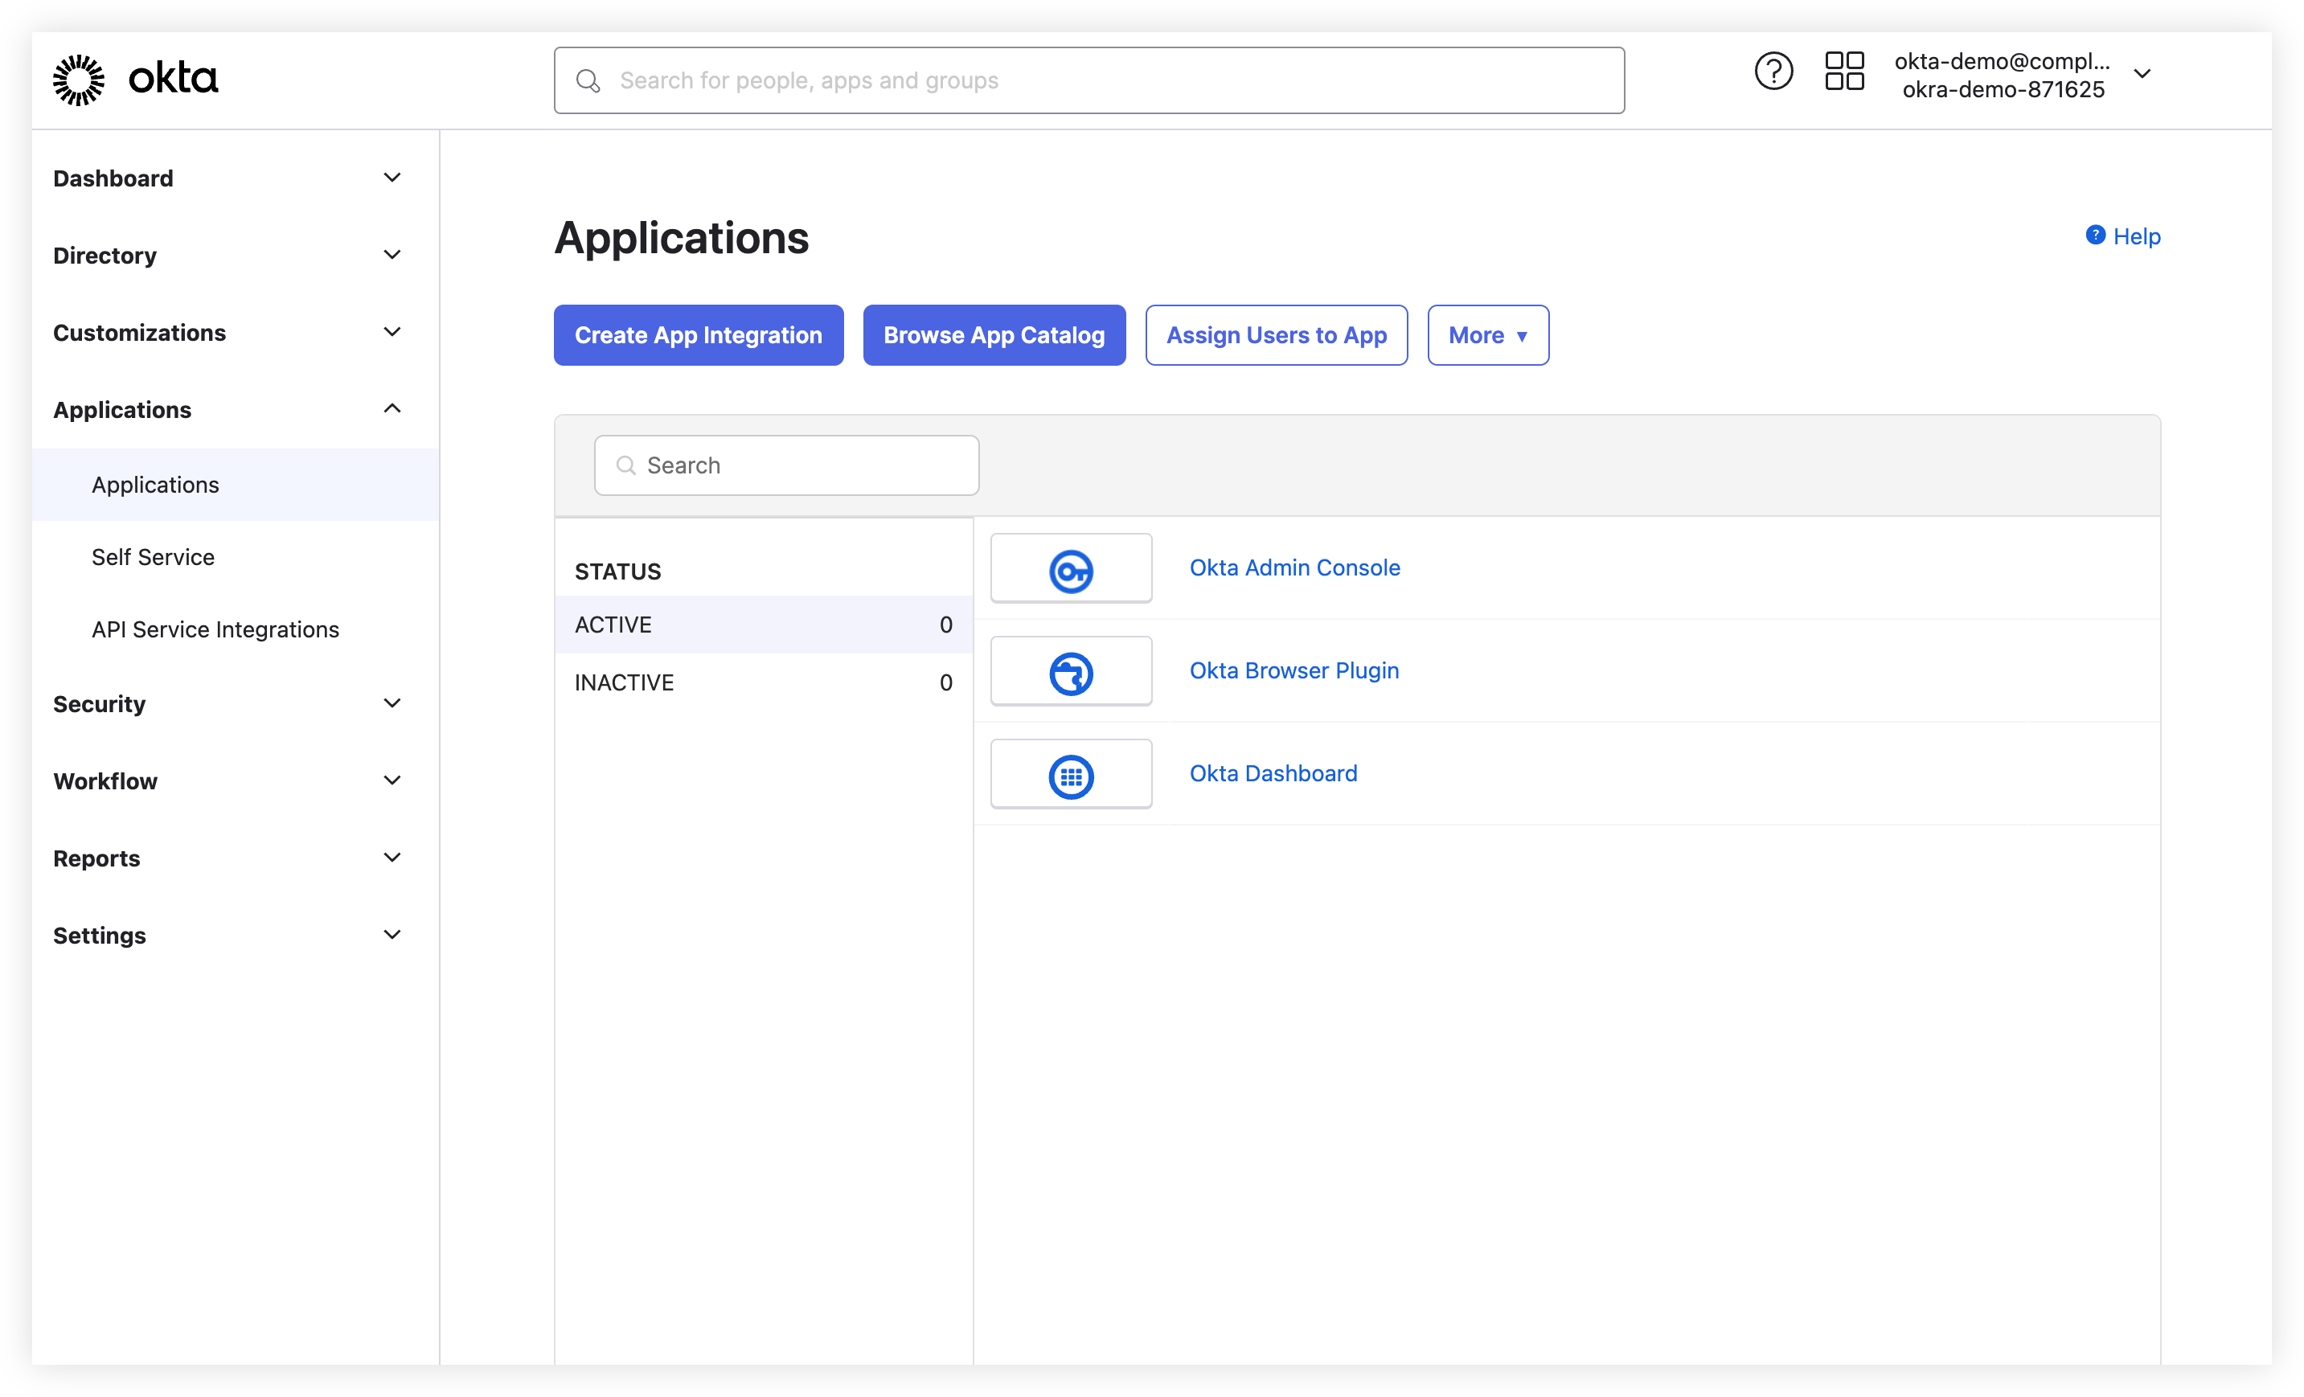
In admin mode, click Applications -> Create App Integration.
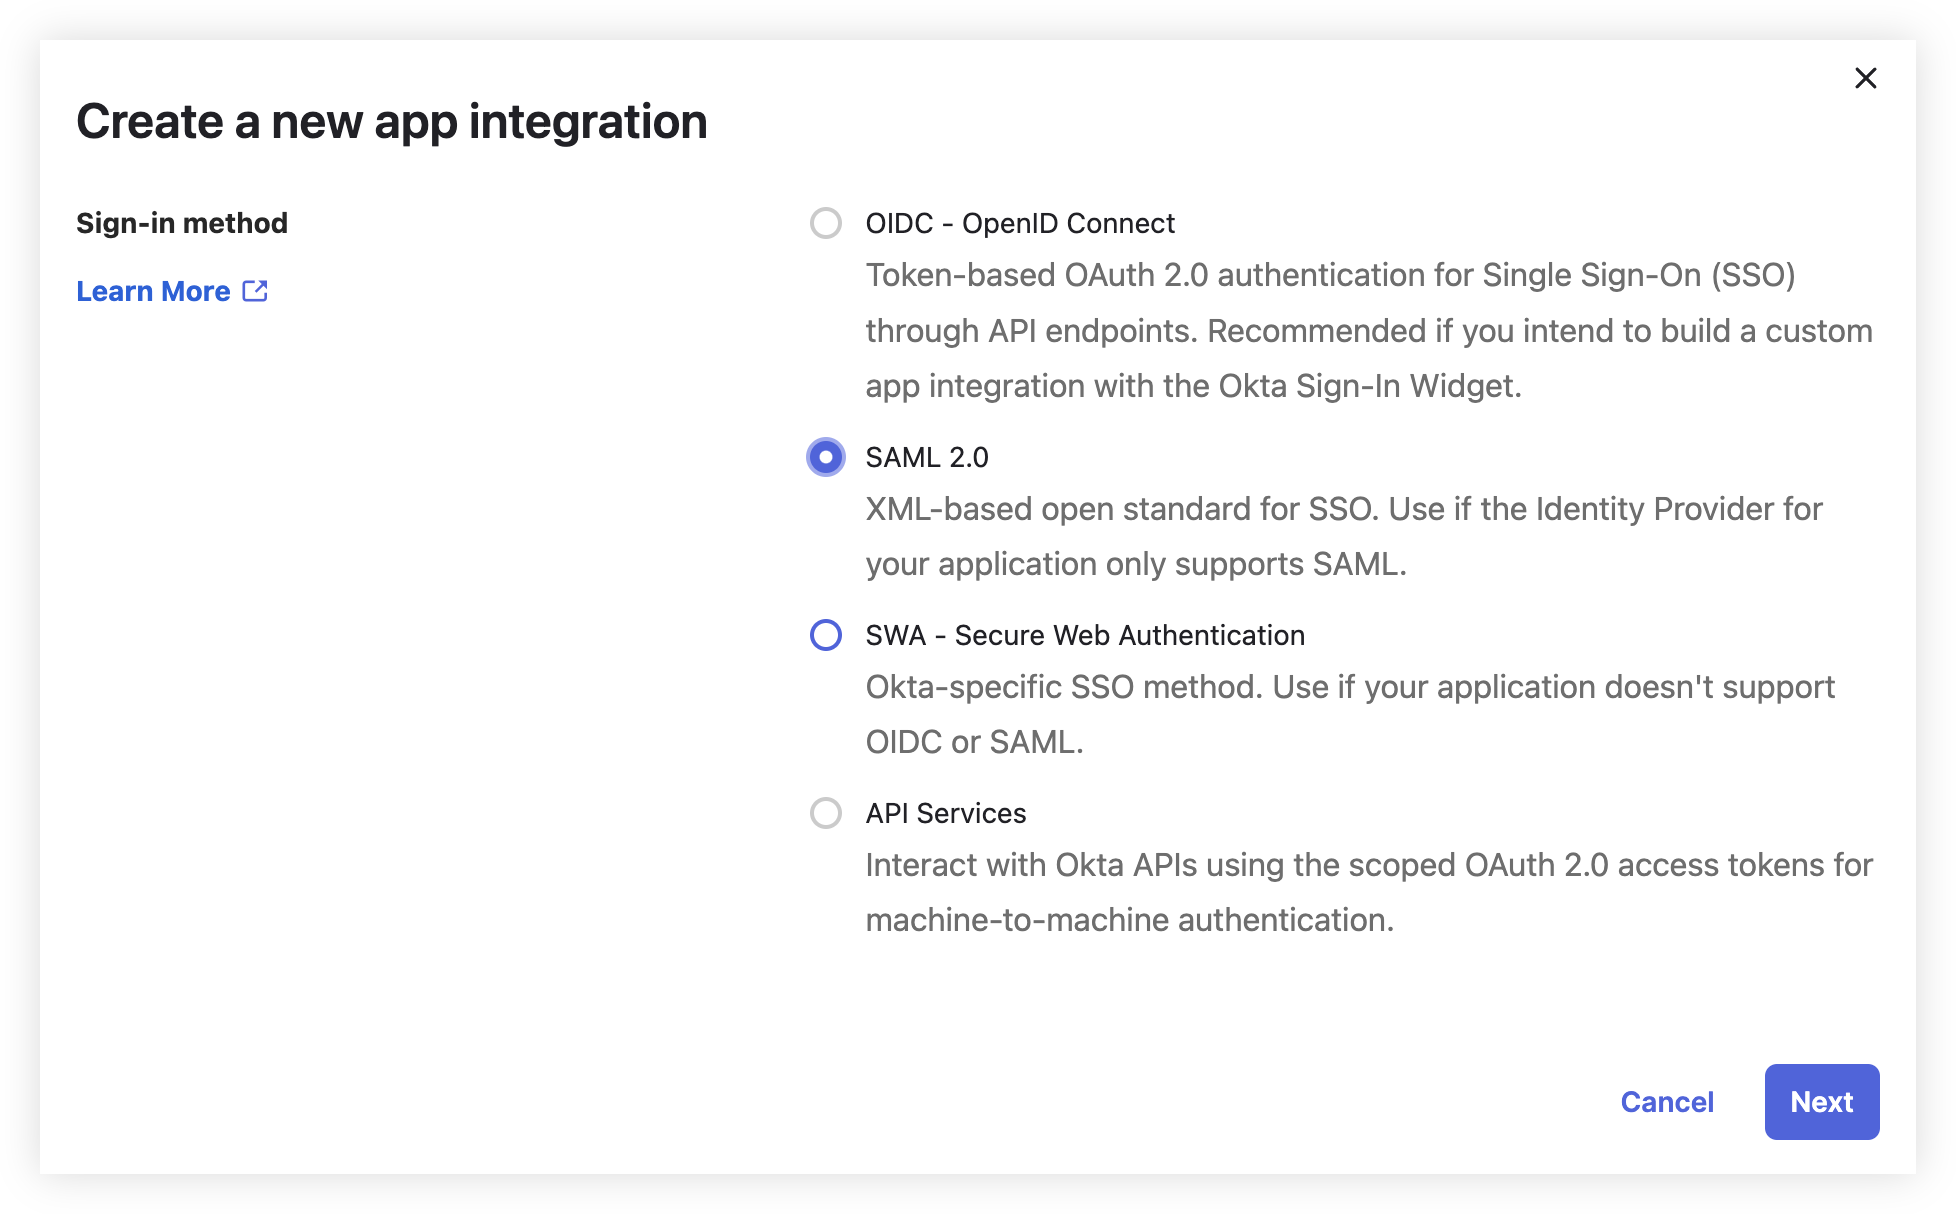
Select SAML 2.0 as the sign-in method.
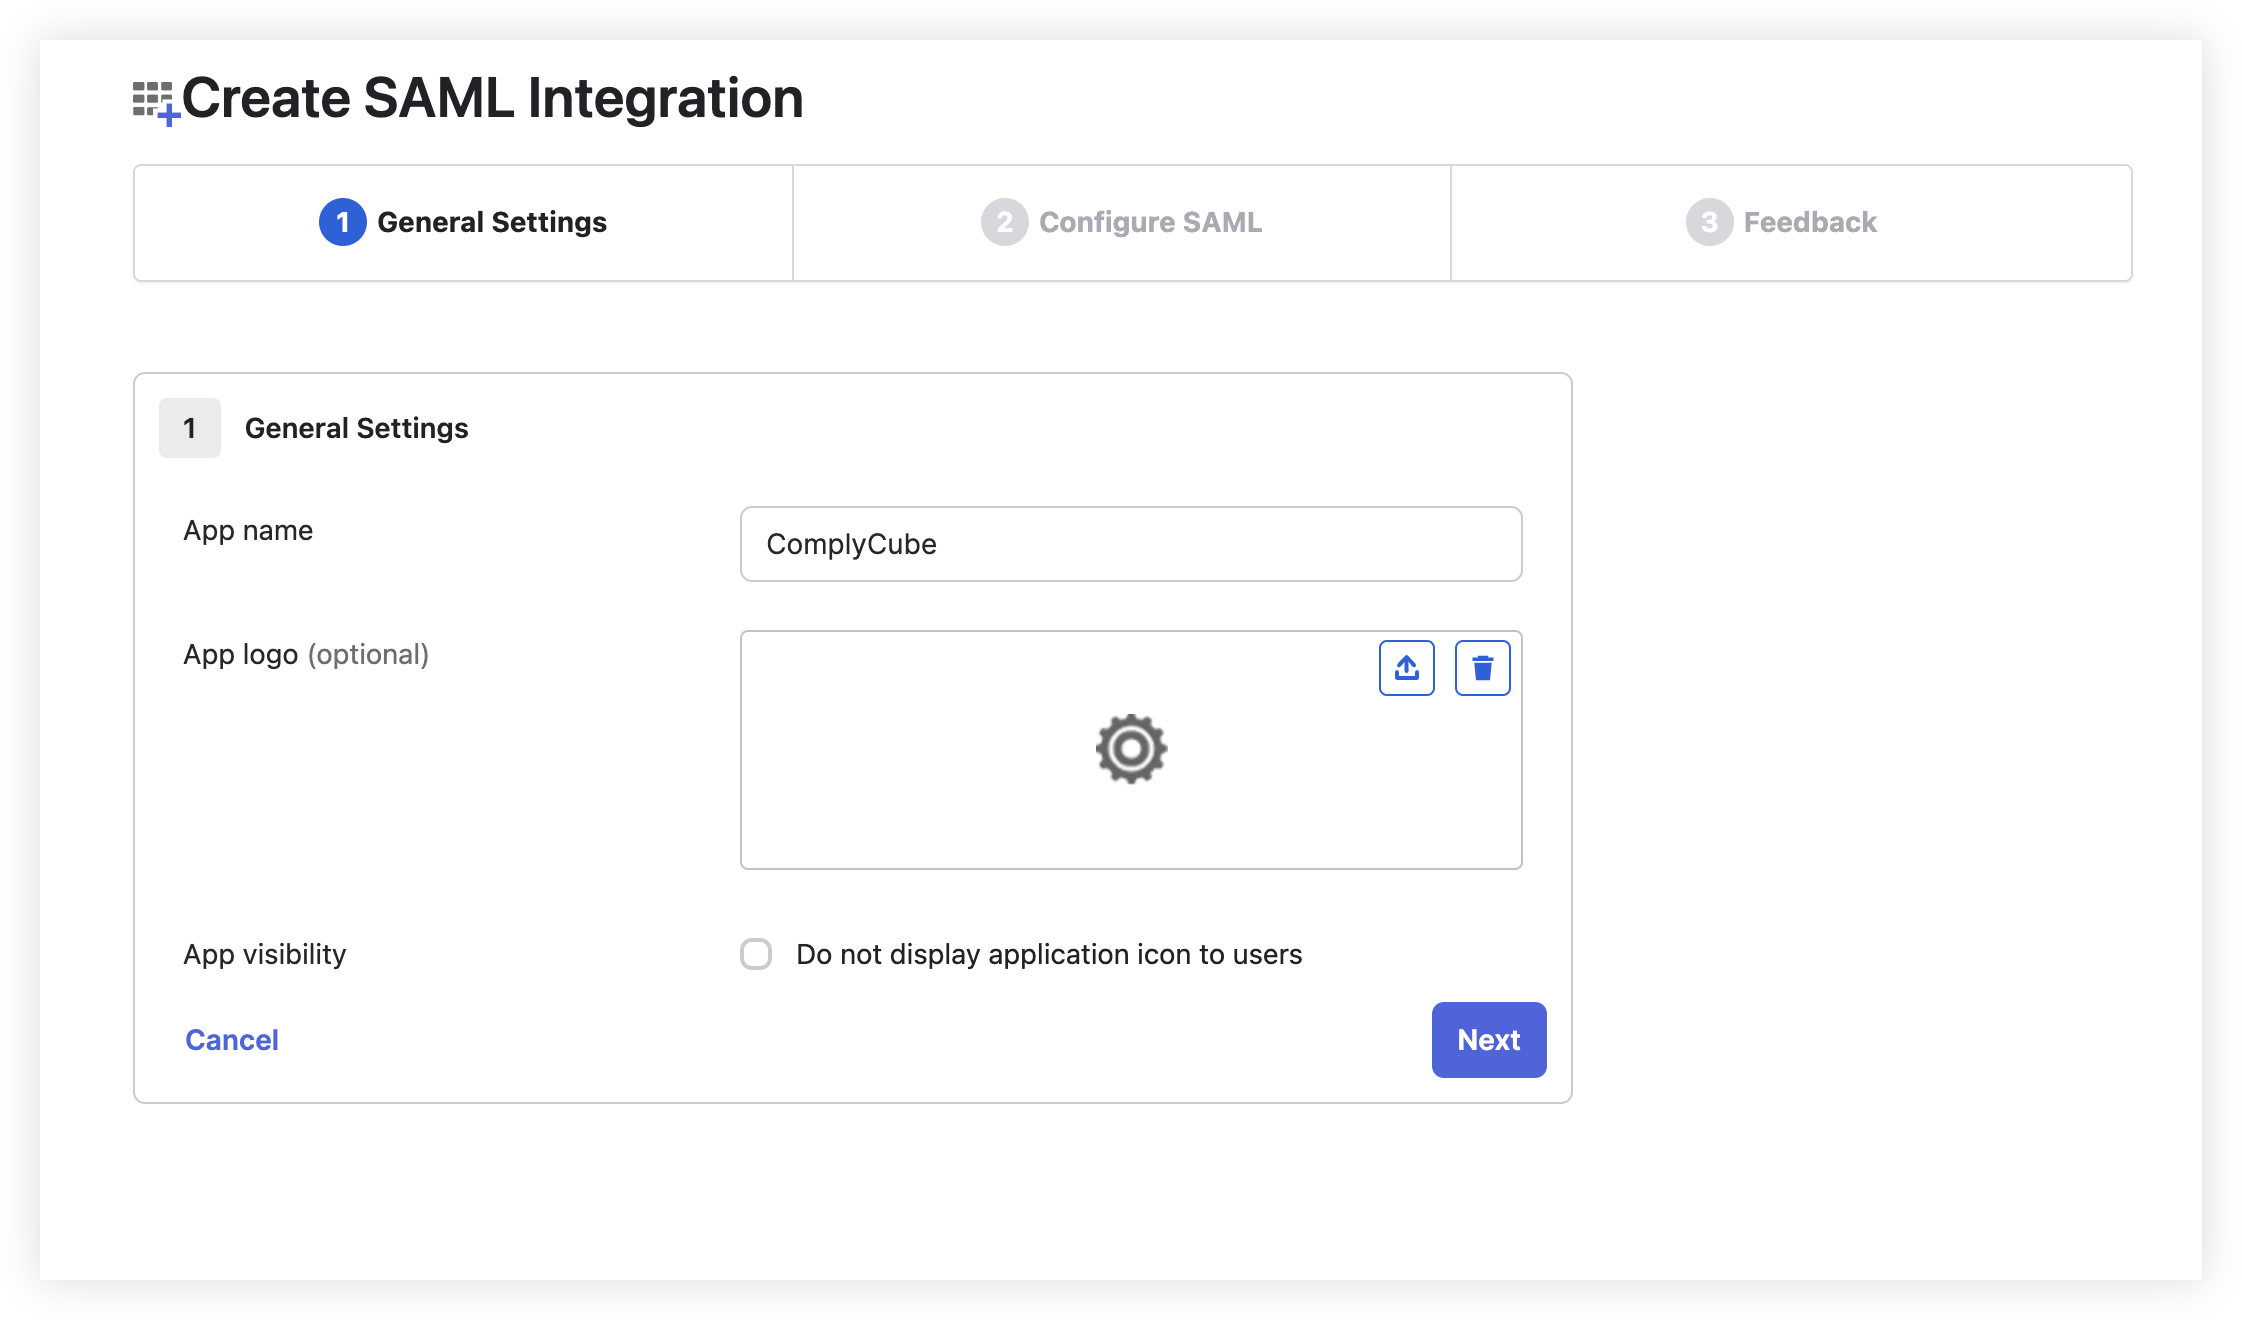
Add the App name "ComplyCube", then click Next.
Copy the Audience and ACS Consumer URL values from your ComplyCube SSO settings page onto the SAML Settings of the application in Okta.
Also, as shown in the image below, please ensure the following Attribute Statements are mapped in Okta - 'firstName', 'lastName', and 'email', as they will be used to update the user profile details in ComplyCube, on every login.
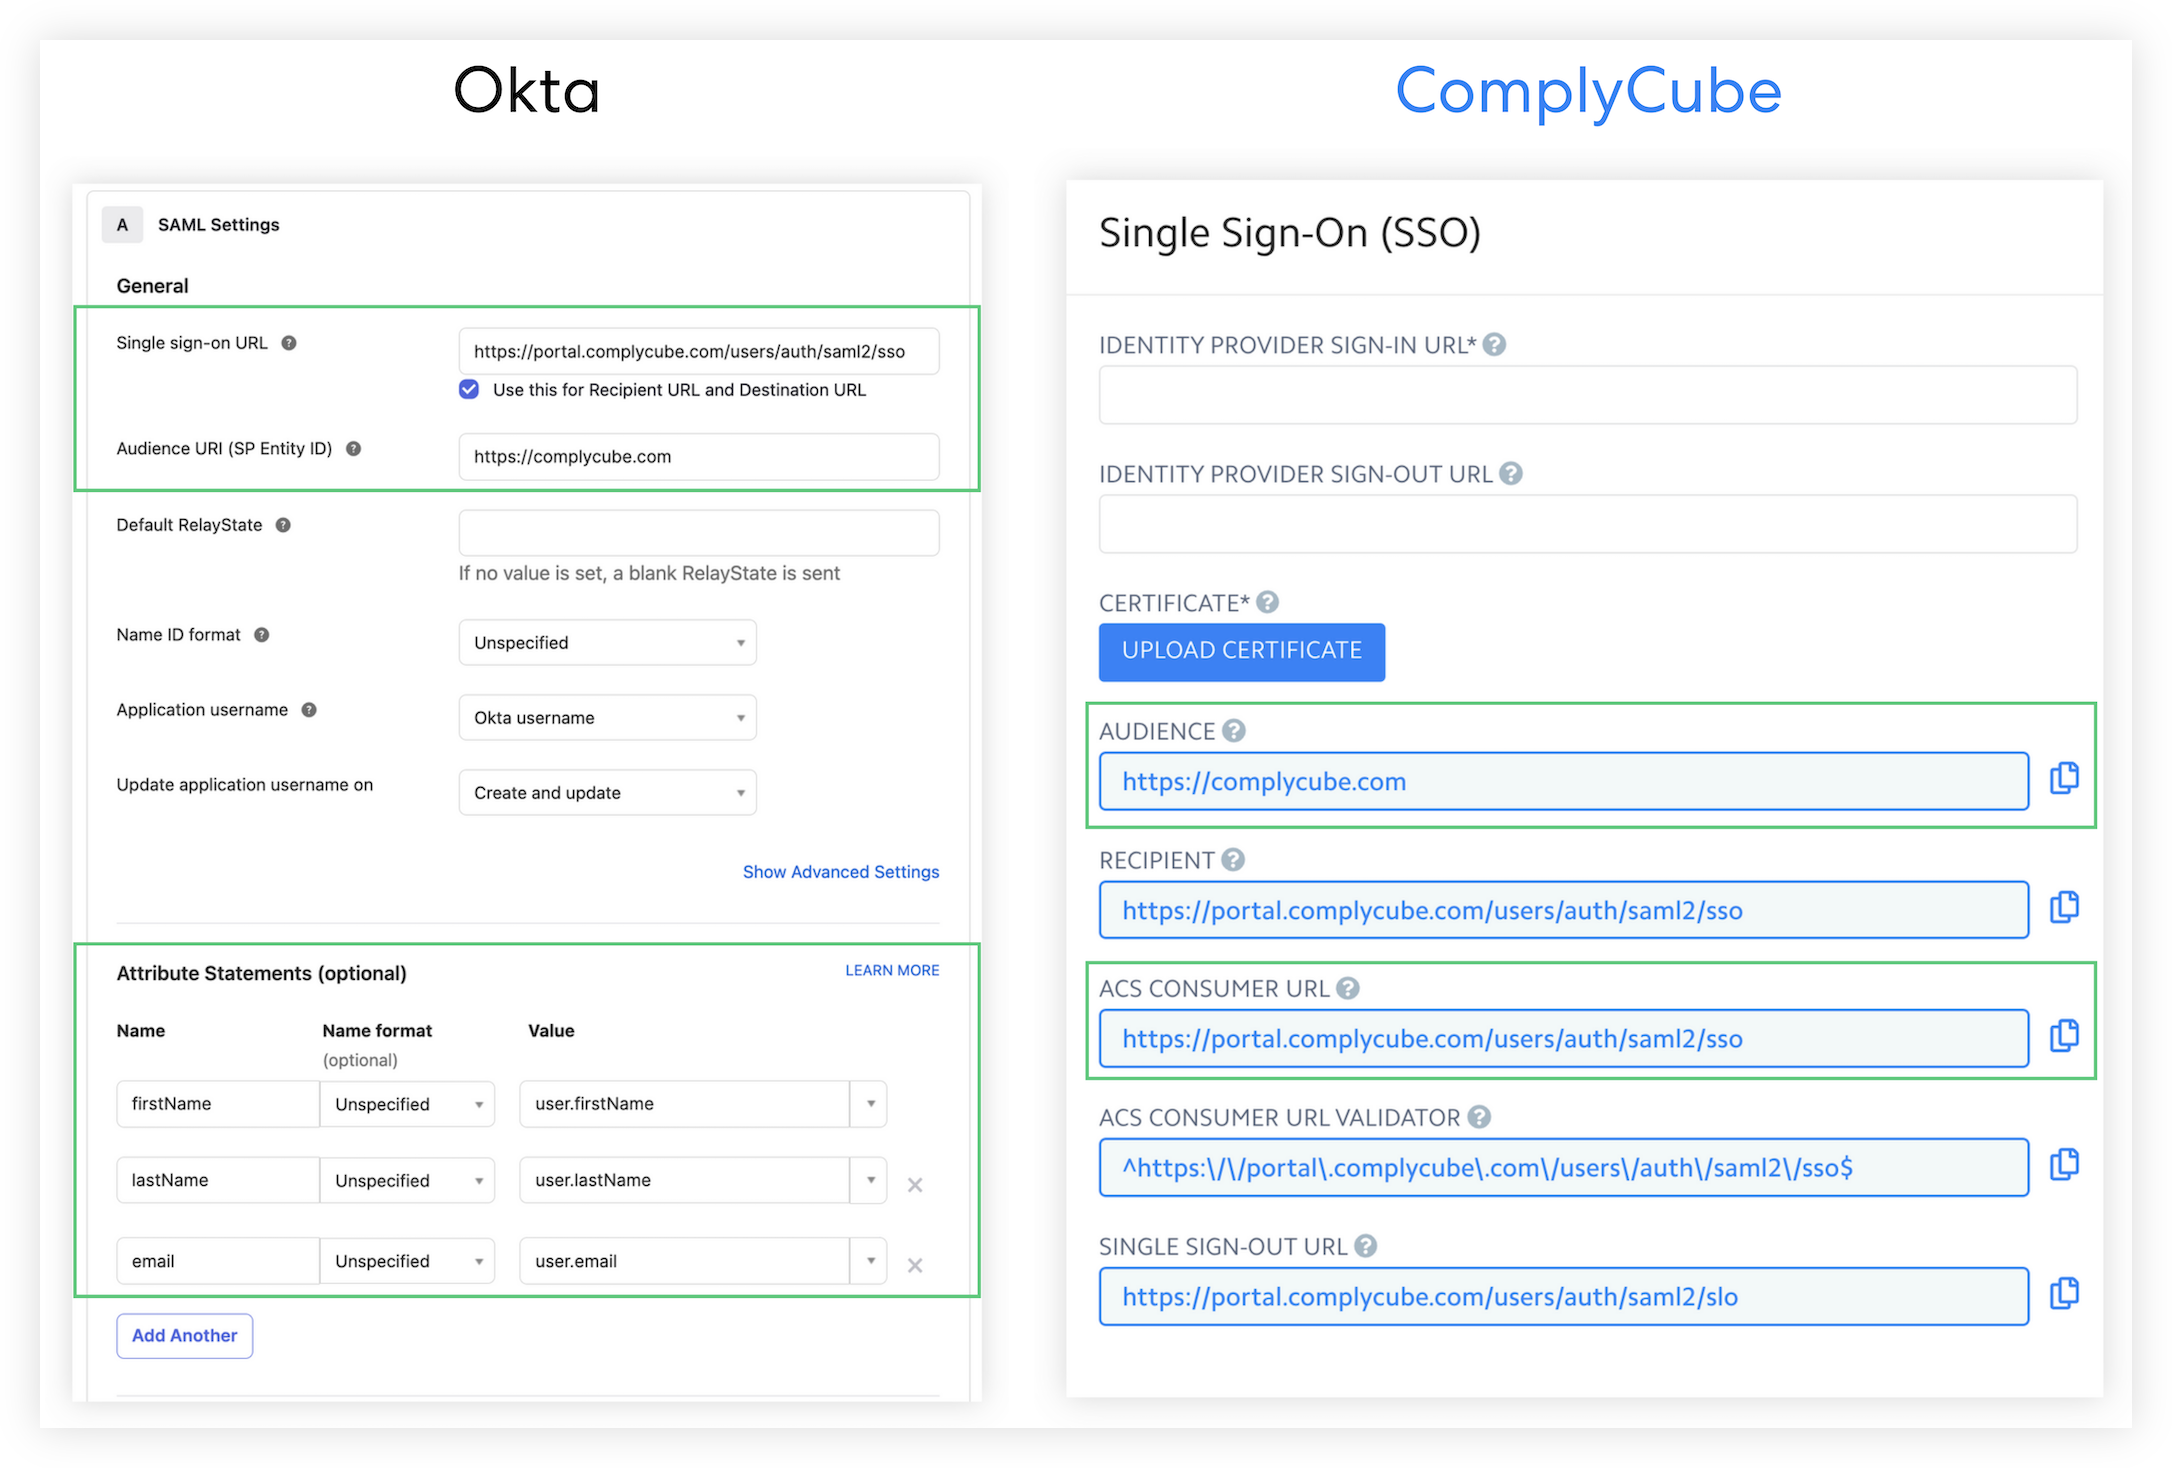
Click Next, then Finish.
People and Group Assignments
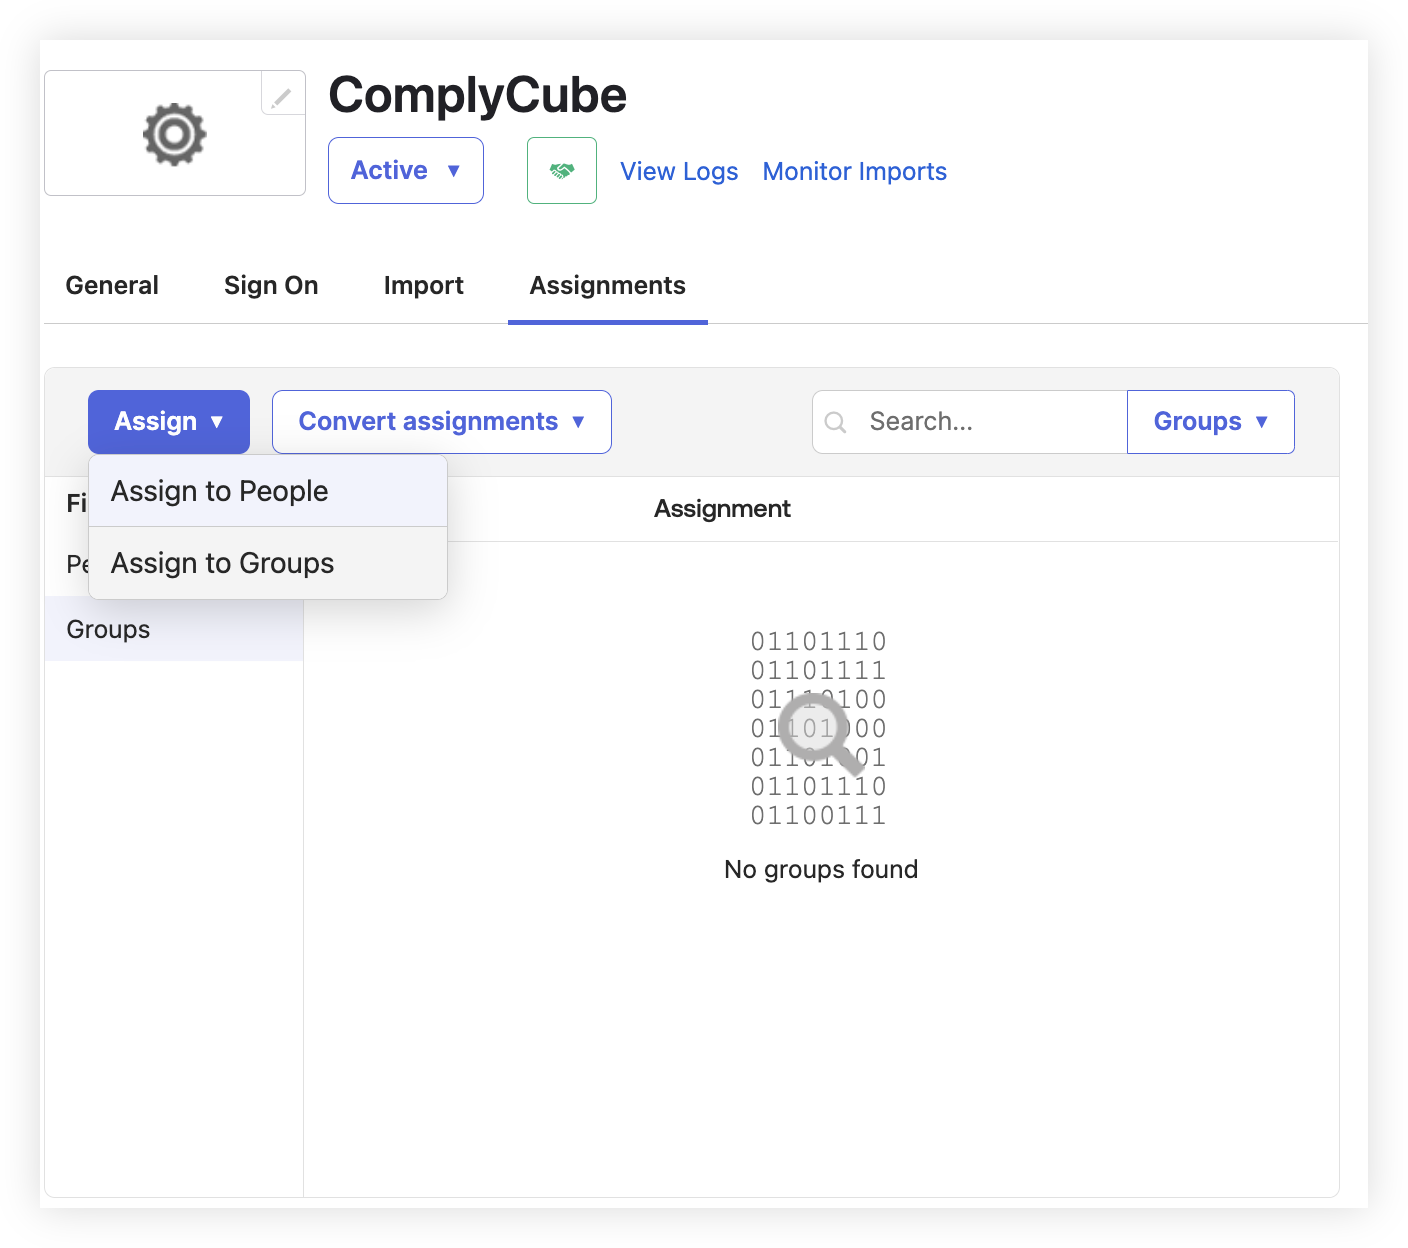
Once the application is added, the next step is to assign people or groups to that application. We recommend that assignments be made at a group level.
First, add the individual user to your Okta directory, Directory -> People. Upon adding your users, you can create a group, Directory -> Group, and assign the individuals to the group.
Now, navigate to the application, Applications -> ComplyCube, click on Assignments, and assign your group.
Update SSO settings in ComplyCube
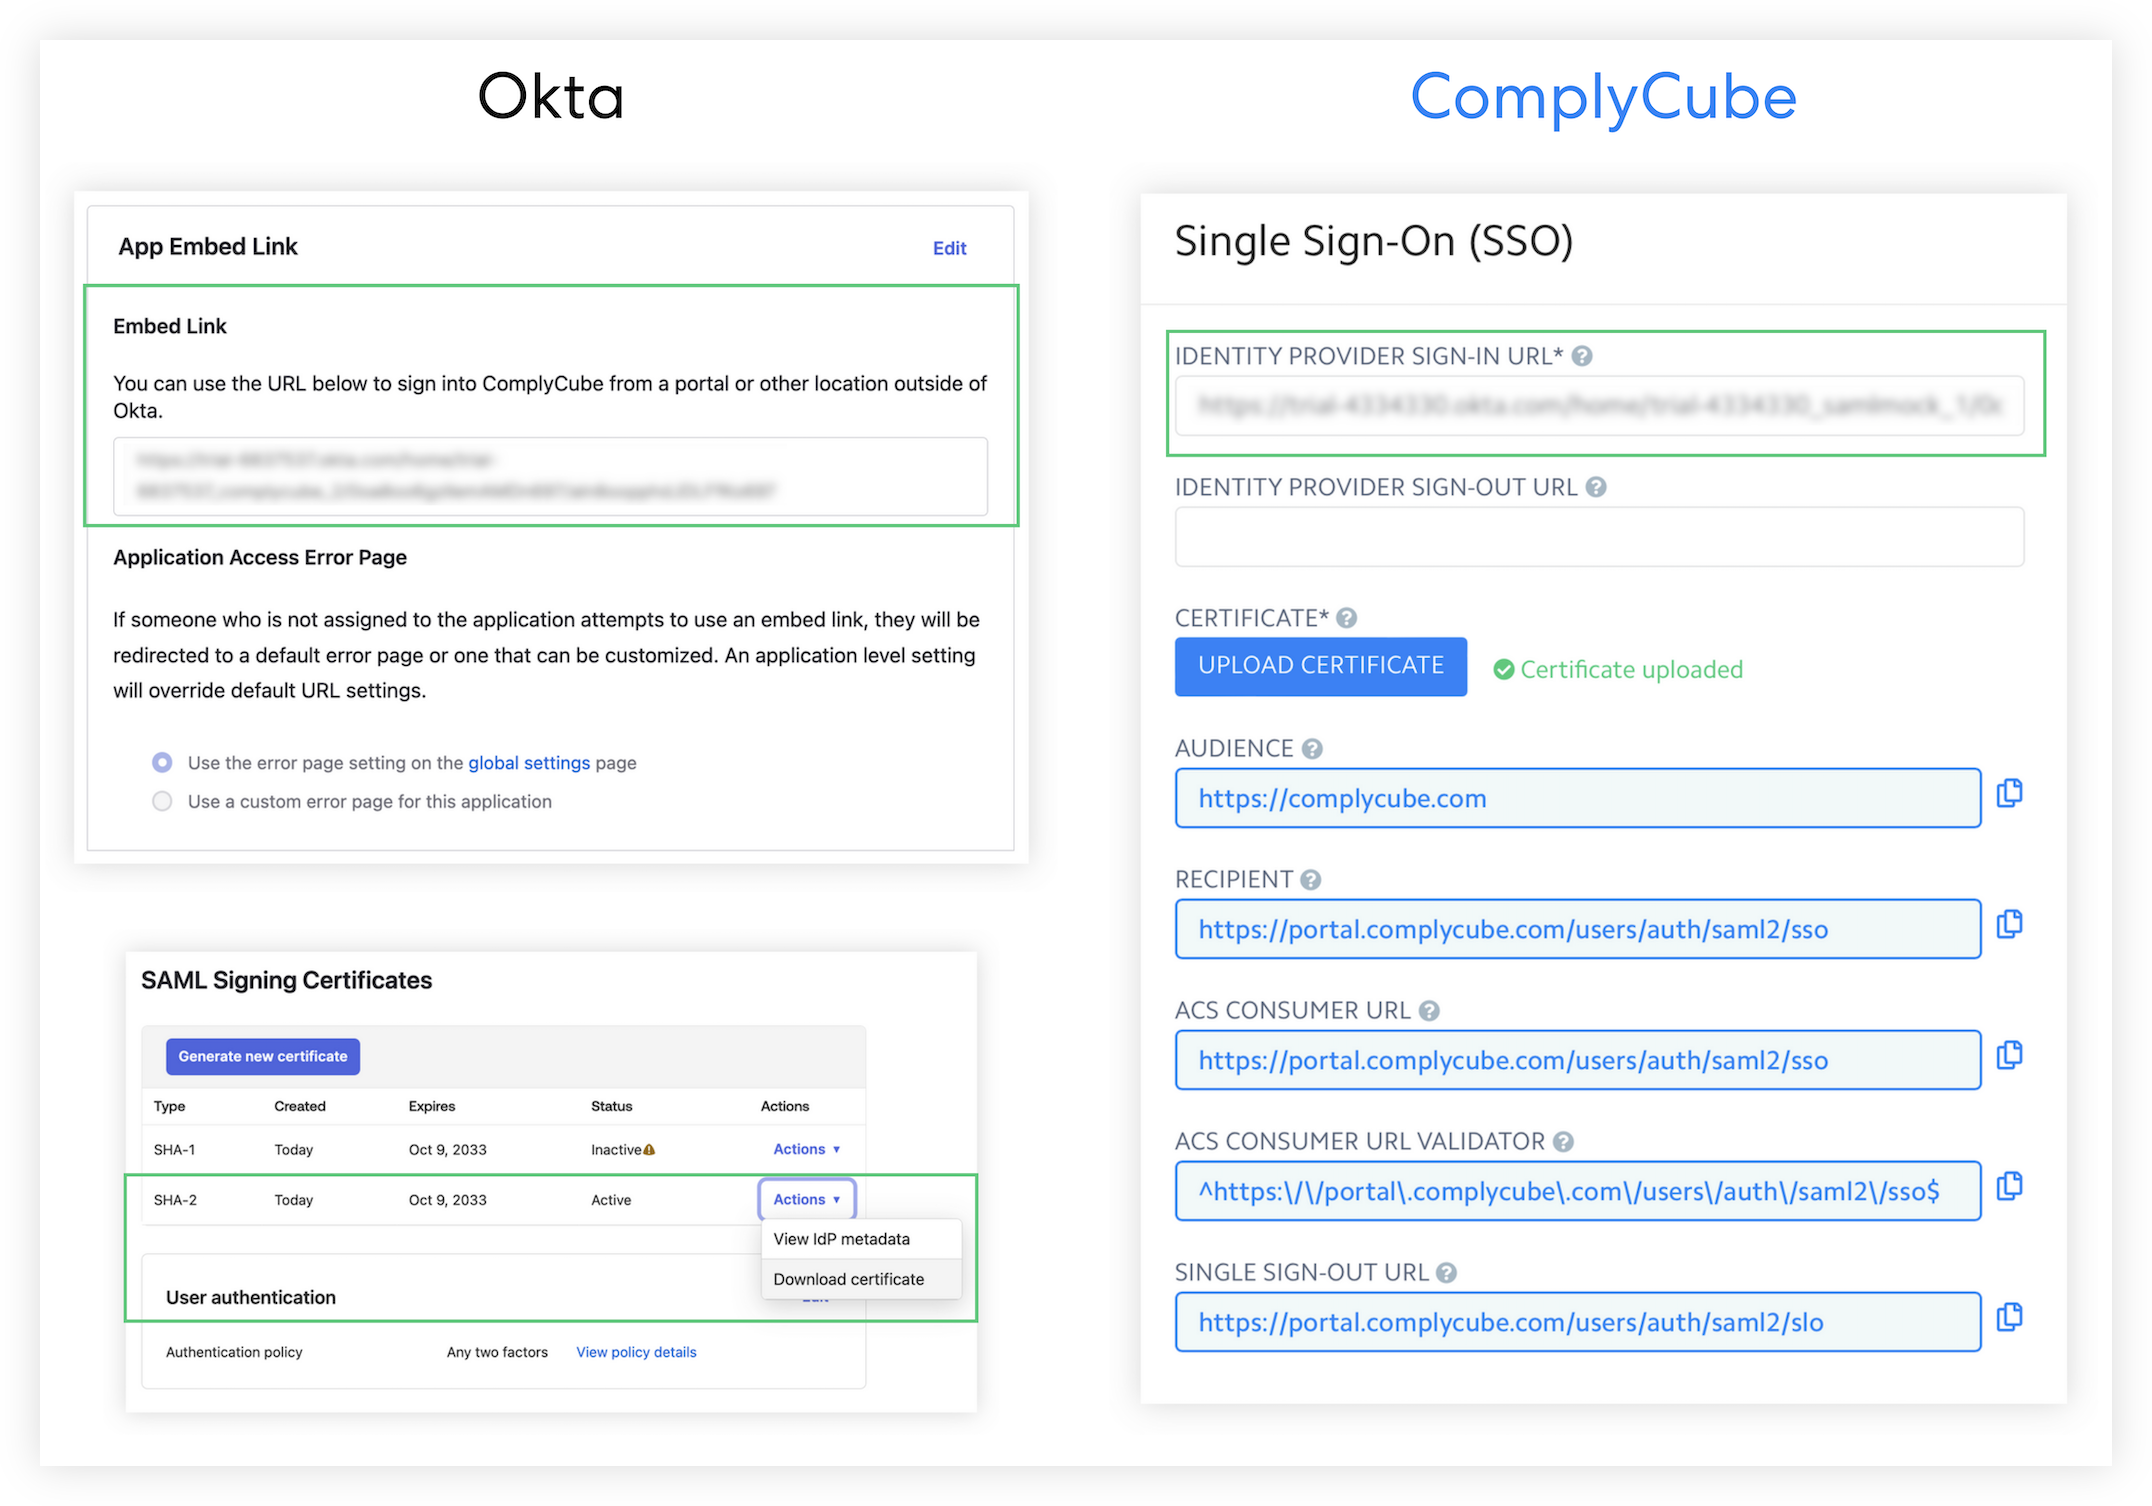
Finally, you can just navigate to your ComplyCube SSO settings page, update the Sign-In URL, and upload your Signing Certificate (i.e., X.509 certificate).
You can find the Sign-In URL in Okta - Applications -> ComplyCube. On the General tab, copy the Embed Link and paste it into ComplyCube.
Then click the Sign On tab and scroll to the bottom to find the Signing Certificates. Download the SHA-2 certificate, upload it into ComplyCube, and save your settings.
That's it, you can now log in to the ComplyCube Web Portal using SSO through Okta.

